
Showing 61 through 80 out of 100 articles containing "router table plans"

Routed Bowls
…. Finally, I added a small foot to the bottom of the bowl. I used a router with a roundover bit at the router table for this job. The third drawing below shows you how this is …as shown in the bowl at right, is easy. All it takes is a little template planning. First, trim a piece of 3⁄4" MDF slightly larger than your blank. Then divide the length …Read More

Woodsmith Issue 170
April 2007

Built-up Crown Molding
…molding. Most often, I rely on my router table to provide the moldings for a project. But as you can imagine, I’m limited by the size of the router bits available and the size of …attention to the color and grain match of the individual pieces. Whenever possible, it’s a good plan to cut all the sections from one board. If necessary, you can use the …Read More
Woodsmith Issue 172
August 2007


Tips & Techniques
…your tip. Woodsmith.com Printed in U.S.A. 5 more tips from our readers Router Table Fence Storage Occasionally I use my router table without the fence. But I never had a place to store the …low for me. This eventually results in an aching back. Rather than modifying plans for a workbench, I hit upon an option that would make my bench higher and…Read More
Woodsmith Issue 192
December 2010

Perfect Edge Profiles
… The router table provides a large, stable bearing surface. But in order to realize the full benefit it offers, the table has to be smooth, flat, and “catch-free.” If the table isn’t…a profile on three edges of a panel (for example the bathroom cabinet on page 16), plan your first end cut so that you can next rotate the panel counterclockwise to…Read More
Woodsmith Issue 193
February 2011

The Secret to Perfect Joints
…do is install one in the router table, and you’re off. Well, almost. There are a few things you need to know. SIMPLE GEOMETRY. When planning a project like this, it’s common…. After installing the bit in your router table, the first step is to set the approximate height. For this, I place the workpiece on the table and “eyeball” the position. What …Read More

Woodsmith Issue 210
December 2013

One-Wall Workshop: Versatile Carts
…29 Now for the ROUTER TABLE The third and final cart is probably the one that you’ll use most — the router table. The large … a rolling router center big enough for all of your gear. While storage is valuable, it’s the top that matters in a router table. …the size of the bases to suit the tools you plan to use. An important part of that is to …Read More
Woodsmith Issue 227
October 2016

5 Plywood Shop Projects
…by building the base for the stand. Both the router table and miter saw station use the same base, so if you’re planning on building both, go ahead and make two. Screws…ticket here. If you are planning on using the station as a miter saw stand, stop here. However, if you’re going to make the stand into a router table, there are additional details on…Read More

Woodsmith Issue 235
February 2018

Simple Circle-Routing Jigs
…. (Sold in sets or individually.) Choosing the right one depends on the size circle you plan to cut. While it’s possible to cut small circles with the large jig, it can… that’s round or arced. You could even put a profile bit in your router and cut a profile on the edge of a table with the large jig. W } To rout an 8!/2"-dia. hole, position the…Read More
Woodsmith Issue 179
October 2008

Talking Shop
… FOR COMMENTS AND QUESTIONS ROUTER ROTATION In Woodsmith No. #6', there ivas an article in Shop Notes on routing rabbets using the router table. In tfie article, you mentioned…1" IS EXPRESSED IN INCHES In Woodsmith, all of the dimensions given in the plans are based on the NHLA standard thicknesses. We usually give the "quarter" designation…Read More
Woodsmith Issue 37
February 1985

Music Box
WEEKEND PROJECT Music Box You have to plan ahead, even on a small box like this. The sides are routed to shape first. Then … length. Finally, glue the inlay strips in place and sand them flush with the veneer. 8 ROUTER TABLE FENCE HOLD INLAY STRIP FLUSH WITH SHOULDER AND MARK WIDTH INLAY STRIP TO ADJUST FENCE…Read More

Woodsmith Issue 71
October 1990

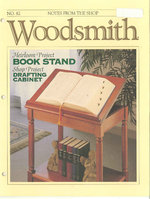
Drafting Cabinet
… That's what this Drafting Cabinet is for — to add a place for drawing and storing plans. Without taking up floor space. Woodworkers tend to think with then-hands. When I get… and glue a W-thick shelf lip (D) on the front edge of the shelf, see Fig. 1, ROUTER TABLE FENCE ROUND OVER BOTH SIDES WITH SAME SET-UP 24 Woodsmith No. 82 BUILDING…Read More
Woodsmith Issue 82
August 1992

Molded Stub Tenon
…few more steps and some careful planning. Then you can get the same results without spending a lot of money. To do this, I simply use my table saw, a router, a chisel, and a shop-…of relying on the bearing to guide my work-piece, I use the router table fence. I start by setting the router bit height. Simply adjust the fence to make a light cut. …Read More

Woodsmith Issue 101
October 1995

Dovetail Key Joinery
…, I’d rout the slots for these keys on the router table. But Bernie Noe of Seattle, Washington, sent in an idea that uses a hand-held router. We took that idea and designed a jig that… No. 105 enough to fit the outside diameter of the guide bushing you plan on using. For the router bit case, I cut three slots and made the one in the middle wider…Read More

Woodsmith Issue 105
June 1996

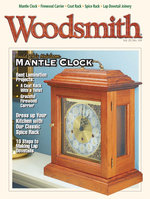
Mantle Clock
… workpiece on edge on the router table. In order to provide a little more support and to prevent the workpiece from tilting, I used the fence on my router table — even though the round… clock to hold the back panel in place. W QUARTZ MOVEMENT CLOCK If you’re planning on using a quartz movement in this clock, there are a couple of things you should…Read More
Woodsmith Issue 119
October 1998

Drill Press Storage Cart
… in Fig. 1. ASSEMBLY. Because all of the pieces interlock, it’s a good idea to have a plan in mind before you start spreading glue on everything. I began by gluing and screwing… of the slot and then routing away the waste in between the holes on a router table, see Figs. 8 and 8a. ALUMINUM ANGLE. Before attaching the outfeed supports to the cart, I …Read More
Woodsmith Issue 127
February 2000

Bead-Front Bookcase
…locking rabbets; all the bead profiles are created with a single bit on the router table, and the frame and panel construction of the sides is straightforward too. …the case (Fig. 7). Usually, I design the top to overhang the frame a little. But here, I planned to “wrap” the plywood edges with 1"-wide trim (identical to Q TOP TRIM (!/2" thick) …Read More

Woodsmith Issue 132
December 2000

Tips & Techniques
… the router under a table. The handle is easy to find and adjust. Milt Schmidt Sunnyvale, California PVC Dust Collector Attachment Recently when building my own router table and fence… a. PLAN VIEW Waste 3"x1!/2" PVC reducer #6 x 1!/2" Fh screws 45° {Z A PVC reducer is cut to fit the fence and works with ordinary shop vacuums for router dust…Read More

Woodsmith Issue 136
August 2001

Barrister's CD Cases
… on the table saw. I use a zero clearance insert around the blade. of the door to accept the glass. As you can see in Fig. 11, this is done on the router table with… options for the base, depending on where you’ll be setting the case. If you plan to stack several cases (especially on a carpeted floor), the weighted pedestal base shown in Fig…Read More
Woodsmith Issue 137
October 2001

Tips & Techniques
… 171 Modified Push Pad To be safe, I always run workpieces through my table saw or router table using a push stick or pad. The problem I have with some commercial push pads…find the hardware I was looking for is time-consuming. So, I came up with a better plan. First, I numbered each bin with plastic model paint. Then, I filled each bin with …Read More