
Showing 1 through 20 out of 89 articles containing "glued up legs"

Glued-Up Legs
…Up. Veneer can make the transition between the individual pieces of a glued-up leg blank appear completely seamless. 58 • Woodsmith / No. 245 then one simple option is to cover the edges of the leg…, glued-up leg blanks have advantages beyond simply adding thickness. Long boards often have a tendency to warp over time, and a strong glue-up of …Read More

Woodsmith Issue 245
October 2019

Techniques for Making Legs
…of the leg is a simple matter of orienting the Woodsmith Make hardboard template slightly larger than final leg size Glued-Up Blank Glue up oversize blank to lay out leg along … you can be sure the legs will stand out for the right reasons. W After cutting, straight grain visible on all sides Completed Glued-Up Leg STEP TWO STEP THREE Glue…Read More

Woodsmith Issue 170
April 2007

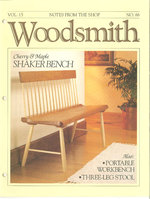
Three-Leg Stool
… Three-Leg Stool Normally 1 don't like surprises. But when working on this Three-Leg Stool, I got a pleasant one after I glued up the blank for the seat. A PROBLEM. It actually started … LAYOUT ON TOP 14» FACE SEAT BLANK 1T0 build the stool, I started by gluing up a seat blank from, lV-z'-wide strips flipped on edge. Sand the blank, and …Read More
Woodsmith Issue 88
August 1993


Curved-Leg End Table
… a smooth, flat surface ready for glue-up. a. a. www.Woodsmith.com Woodsmith 23 gluing up the Legs With the strips for the legs cut and the template shaped and sanded, … removing the leg from the bending form. After gluing up the remaining three legs, you can break out a scraper and remove the squeezeout. I also like to follow up with a …Read More

Woodsmith Issue 168
December 2006


Shaping a Cabriole Leg
…cut” the waste on the band saw. The leg is finished up by refining the shape with hand tools … your way up the leg. LAYOUT LINES. Just below the hump of the knee, the leg is pretty square…leg post. This way the grain and color is a good match. You start the process by using the template to lay out and cut the block to its “beaked” shape before gluing…Read More

Woodsmith Issue 174
December 2007

Making Leg Blanks
… on the faces. Even after the leg is shaped, no one will be able to tell that it was made from a two-piece, glued-up blank. But the real advantage you … leg and the grain pattern work together to make a great-looking leg. TWO HALVES. Getting this look takes a little extra work, but it isn’t difficult. Basically, you start with an oversized, glued-up…Read More

Woodsmith Issue 147
June 2003

Square Leg Design
…the square leg. So I simply created round tenons by gluing dowels into holes drilled in the ends of the legs, refer to Fig. 5. making the legs. The first step in building the legs is … the lower legs. feet. To create the look of a foot on each leg, I used the table saw again to cut a V-groove 2" from thebottom end, see Fig. 2,To set up this cut, …Read More
Woodsmith Issue 82
August 1992

Cabriole Leg Footstool
… 12"-long leg (A) and the two transition blocks (B) that are glued to the sides of the leg, see Fig. 1. TRANSITION BLOCKS. Once the blanks are squared up, trim off…, after the legs are shaped, the leg/ apron assembly can begin, see Fig. 5. I glued up the legs in pairs, starting with the two front/back aprons (C) and corresponding legs. Shop Note: …Read More
Woodsmith Issue 43
February 1986

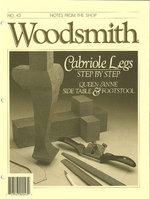
Cabriole Legs
…the leg in a block of wood, then carve away everything that isn't a leg. But the truth is that a cabriole leg almost evolves by itself. As an experiment, try gluing up some scraps of 2x4 to get a block with a rough size of 3"x3". Then draw the leg…Read More
Woodsmith Issue 43
February 1986

Traditional Swing-Leg Table
… legs. To get started, you’ll need four 21⁄8"-square blanks cut to length. The blanks can be glued up, but blanks cut from solid stock will give you a nicer-looking leg. The leg…is to take on each distinct task in the right order. GLUEUP. To get started, I glued up and surfaced three, oversized panels — one for the center section and one for each …Read More
Woodsmith Issue 178
August 2008

Square It Up!
… box below shows another option — a shop-made jig for gluing up panels. It features a square corner formed by two fixed… sliding fence on the opposite end allows you to square up the assembly before adding clamps. PROCESS. I use a simple assembly … main photo on the opposite page. A clamp on each leg of the square holds two workpieces in place while…Read More
Woodsmith Issue 213
June 2014

Highchair
…, I screwed the Confirmat screws through the leg frames and into the steps (E, F) and the seat (G). the back.To make the back (H), start by gluing up a 3/4"-thick blank, see Fig. 17. Then bevel the bottom edge at 7* .To trim the sides to fit between the leg frames, set the miter …Read More
Woodsmith Issue 67
February 1990

Fern Stand
… bending.) No. 72 Woodsmith 21 LEGS After ripping all the oak and walnut strips, the next step is to glue-up the legs. gluing the strips. Start by spreading the… three legs are complete, work can begin on the shelves. The circular shelves (C) are cut from :i/4"-thick walnut blanks with a router. To make them, start by gluing up three 8" x 8" …Read More
Woodsmith Issue 72
December 1990

Coffee Table
…and tenons. BUILT-UP LEGS. The legs are built up from 3/4"-thick oak. But they're not put together the way you might think. First, two pieces are glued togetherto form an … the pieces can be glued up into four U-shaped assemblies (two end assemblies and two side assemblies). Note: The apron sides will not lap completely over the leg sides, see Fig…Read More

Woodsmith Issue 80
April 1992

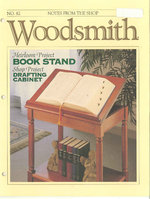
Book Stand
…there isn't a dust panel, see Fig. 6. BEADING. Once the top and shelf frames are glued up, add a decorative bead (G) to the bottom edge of the aprons, see Figs. 6 and 6a… is to make the upper legs (J) and the lower legs (K). I turned the legs, tapering the lower legs, refer to the Leg Diagram on page 7. (Note: An alternate leg design that does not …Read More
Woodsmith Issue 82
August 1992

Shop Notes
…the half-frames, see Fig. 2. To cut the plywood, set up the fence on the saw a little wider than the glued-up half-frame and rip the plywood so the edges are parallel…the rocker, see Fig. 1. Now place one of the rockers on its corresponding legs and gently sand the legs until they match the arc, see Fig. 2. 1 APPLY ADHESIVE-BACKED 100-GRIT …Read More
Woodsmith Issue 84
December 1992

Shop Notes
…gluing multiple strips into a thick slab, the strips tend to slip around when they're clamped. (Because of the glue.) That's the problem I faced when gluing up the seat of the Three-Leg Stool on page 16. So I came up with a way to keep the strips in alignment during glue-up. The trick involves…Read More
Woodsmith Issue 88
August 1993

Coffee Table
… shape of the transition blocks where they join the aprons. RAILS & STRETCHERS . When the legs are complete, the next step is to connect them with 3/ "-thick side aprons 4 (B)andfront/… I set about to build the top. This is pretty simple really. The top is just a glued-up mahogany panel cut in an oval shape. To do this, I began by making a paper …Read More