Showing 181 through 200 out of 202 articles containing "drill press table"

Turned Canisters
… have a dished-out interior. I found it best to do this at the router table and table saw before the staves were glued together. The How-To boxes at the bottom …mounting disc to rough size at the band saw. Carriage Bolt Hole. Drill the counterbore and center hole at the drill press. Faceplate. Attach the mounting disc to the lathe faceplate with …Read More
Woodsmith Issue 223
February 2016

Shop Notes
…, as shown in Figure 1a. At the drill press, drill out the end of each slot (Figure 1). ROUTING A SLOT. I often use a straight bit in the router table to create a smooth groove. So it only… and start threading lag screw by hand to confirm proper location Align guide to pre-drilled holes on main panel Read More
Woodsmith Issue 228
December 2016

Tips & Techniques
…glide across the rollers smoothly. Michael Cyr Westport, Massachusetts Magnetic Router Table Upgrade My laminate-topped router table lacks a miter gauge slot. This is a problem when I want to …router table where the hold-downs and stop blocks are tucked away, but close at hand. I also made a couple of small blocks for either side of my drill press,…Read More
Woodsmith Issue 229
February 2017

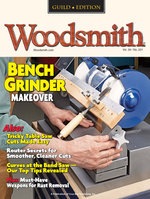
Bench Grinder Makeover
…the table saw, finish the notches at the band saw. Mounting & Insert Holes. Drill the mounting holes and the hole for the threaded insert at the drill press. … Dado blade #/4 #/4 END VIEW M %/8"-rad. 5!/4 N Drill Holes. Complete the mounting holes, as well as the larger through hole for the threaded rod, at the drill press. Rabbet Bracket. A …Read More
Woodsmith Issue 231
June 2017

Shop Notes
… Waste Waste Oversized blank FIRST: Cut blank to size along perimeter lines at the table saw Waste Set miter gauge to 45° Aux. miter fence Woodsmith.com • 65 Installing …all the way down (Figure 2a). After cutting the bracket to length, head to the drill press to drill the mounting holes as shown in Figure 3. Finally, round the long arm to …Read More
Woodsmith Issue 237
June 2018

Butcher Block
…drill press. 50 • Woodsmith / No. 238 After laying out their locations, drill them at the drill press and clean up the walls with a chisel (Figures 1 and 2, previous page). While I was at the drill press…brace workpieces in hand, I headed over to the router table. The detail in Figure 2 shows how to set Materials, Supplies & Cutting Diagram A B …Read More
Woodsmith Issue 238
August 2018

Spiral Candle Holder
…box on the previous page shows the simple setup for making these notches at the table saw. Since these legs eventually fit over a round spline, it’s necessary to undercut the … curve (Figure 3). I used a spindle sander for the inside curve, but a sanding drum in the drill press would work, as well. Finally, head back to the band saw to cut each …Read More
Woodsmith Issue 239
October 2018


Mortising Machine
…square up the corners with a chisel. Wrap it all up by drilling a hole to accept the table lift mechanism. UPRIGHT ANATOMY. The upright is a T-shaped, five-part …drilled to accept a particular piece of hardware. What’s important here is that all the holes in the corresponding parts align. So I set up a fence and stop block at the drill press…Read More

Woodsmith Issue 253
February 2021

Kitchen Chair
… treatments and bold geometry. It’s a perfect match for a certain kitchen table. If you found the kitchen table we built a while back a tempting project, but shied away because of …cutting the two blanks to their final size. Then it’s off to the drill press to drill the shallow counterbores on the underside followed by the shank holes for screwing …Read More
Woodsmith Issue 273
June 2024

Tips & Techniques
…nearest the saw table for the bar of the miter gauge. To attach this extension, I drilled two >/i" holes in both the front and back rip fence guide rails. Then I drilled corresponding holes in…of the nail penetrates through the wood. To use the tool, the two posts are pressed against the outside edge of the frame as the tool is guided around the …Read More
Woodsmith Issue 24
November 1982

Tips & Techniques
… from the edge of the table to the fence slot. The adjustment mechanism is made from another carriage bolt that presses against the back of the router table fence. The bolt fits through… or make notes on it with a pencil. The laminate is so thin that you can drill a tiny hole in it and stick a pencil lead through the hole to mark sci-ew…Read More
Woodsmith Issue 49
February 1987

Tips & Techniques
… blade and then'lower the blade below the table. Next center the router table fence over the saw blade and clamp it… yellow wood glue around the back edge of the frame and press the paper down smooth. Now with a damp sponge or a spray… should equal this dimension. Once this is laid out, drill a hole for the dowel and glue it in place. Finally, I …Read More
Woodsmith Issue 54
December 1987

Tips & Techniques
…of the adjacent surface. This is often the case with table tops, coun-tertops, and plywood panels. I use my …the depth so the bit just touches the work surface. PRESS DOWN ON BLOCK TO KEEP ROUTER LEVEL Now, … pilot bits, 1 substituted twist chill bits. The #6 "Scru-Drill" uses a %-i" twist bit. The #8 bit accepts a %■/ twist bit. And the #…Read More
Woodsmith Issue 58
August 1988

Tips & Techniques
…'/6 SIZE ( "v/^*^^ y^ V-GROOVE jpr - ' SHEETS ^ 1/4 SIZe\^J^ SHEETS ^T ^ FOR CUTTING K___ __/ C-CLAMP TABLE I have an extra "workbench" made out of… at the location marks on the table. Drill holes at both ends of the ovals… strip and align it with the edge. Press the strip against the first brad …Read More
Woodsmith Issue 63
June 1989

Folding Desk Clock
…clock is stained. CLOCK HOLE. The quartz clock movement simply press fits into a 23/ "-dia. 8 flat-bottomed hole in the center… see Figs. 2 and 2a. (To prevent the drill bit of the cutter from drilling through the panel, make sure it’s flush …, see Fig. 4. (I used the cast iron top of my table saw.) With the glue dry and the two halves essentially…Read More

Woodsmith Issue 120
December 1998

Shop Notes
… it over, pressing the carpet-taped hinge against the post. Now the position of the hinge can be marked on the post, see Fig. 2a. And you can even drill the pilot… it one last time (leaving the hinges on the posts) and trimmed it on the table saw. W 1 2 a. 3 4 a. 22 Woodsmith No. 124 Plate Rack Grooves While most of the plate rack is…Read More
Woodsmith Issue 124
August 1999

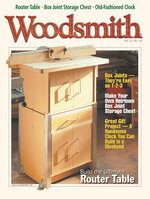
Box Joints
… 1 a. (Figs. 1 and 1a), so its size isn’t too important. What is important is to drill oversize shank holes when screwing the fences together. This creates a little “play” so you … below. I focus on keeping the pieces held tight to the jig and pressed down flush to the table. But as I’ve said, this is almost automatic. 1 Begin with the front …Read More
Woodsmith Issue 131
October 2000

Tips & Techniques
… the bit while keeping it pressed firmly to the router table fence. The base and fence of the featherboard are made from 3⁄4" MDF. I drilled oversized holes for the caster studs… NOTE: Attach casters to fence before attaching fence to base PLASTIC TUBING DRILL STOP Here’s a quick drill stop I use all the time: Simply cut a length of plastic tube, …Read More
Woodsmith Issue 172
August 2007

Shop Notebook
…’s chest on page 30 is pretty straightforward. You simply drill separate holes for the pins and the sleeves and press them in place. The challenge is in positioning the holes … created the rounded portion of the profile using a core box bit installed in my router table. As you can see in the main drawing below and detail ‘a,’ I routed across the …Read More