
Showing 321 through 340 out of 418 articles containing "table saw jigs"

Shop Notebook
… splines. the proper angle while you cut the kerfs at the table saw. KERFS. To cut the kerfs, raise your saw blade to the proper height. (You want the kerfs to …’s 1⁄ " away from the blade. 4 Now with the workpiece resting in the V-notch, push the jig and the workpiece through the blade (Figure 2). After cutting the first kerf, rotate the …Read More
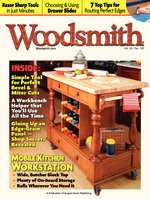
Woodsmith Issue 182
April 2009

Tips & Techniques
…adhesive sandpaper Apply wax in dado for a smooth slide 45˚ 4 6 #/4" x !/4" dado Plug Sanding Jig I needed a quick, easy way to form a chamfer on the end of some very… Peter Harvey De Winton, Alberta Thin Strip Gauge Cutting thin strips on the table saw is always a challenge and sometimes a safety issue. That’s why I made this simple gauge…Read More
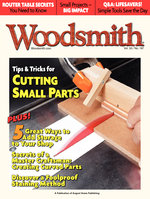
Woodsmith Issue 183
June 2009

Tips & Techniques
…A featherboard is a great accessory for supporting a workpiece when cutting on the table saw. But if you’re cutting a workpiece on edge, …jig. Bert Drost Des Moines, Iowa Howard Huisingh Hudsonville, Mississippi SAFER PUSH STICKS It’s important for push sticks to have a firm “grip” on a workpiece as you push it across a router table or table saw…Read More
Woodsmith Issue 184
August 2009

Tips & Techniques
…are held together with screws, washers, and knurled nuts (inset photo above). To use the jig, loosen the nuts and move the L-shaped pieces so that the inside dimensions match the… An auxiliary fence is a must-have if you’re cutting rabbets or thin strips on a table saw. When I built this one, I intended to use it to protect my rip fence during those…Read More

Woodsmith Issue 188
April 2010

Tips & Techniques
from our readers Tips & Techniques Resaw Jig There are a variety of band saw jigs that you can make or purchase. The one I came up with clamps into the miter … No. 189 Squaring Up Stock When I have a lot of workpieces to square up at the table saw, it can be timeconsuming to stop and make reminder marks on each board after I make…Read More

Woodsmith Issue 189
June 2010


Shop Notebook
… of the stopped dadoes and rabbets, as well as the dovetail slots. CONSTRUCTING THE JIG. To build the jig, start by cutting a piece of hardboard to the overall size of the base… to complete the profile. Finally, rip the bead molding free from the blank at the table saw, as you see in Figure 2. Cock Bead Gauge When it comes to adding the cock…Read More
Woodsmith Issue 192
December 2010

Tips & Techniques
… readers Tips & Techniques Sliding Tall Fence There are several tasks on the table saw that are just safer to perform using a tall fence. Being able to clamp the …with a back saw. But holding the saw perfectly vertical while making the cut is difficult. And with a thin blade, there’s a chance the saw could wobble. So I built the simple jig you see…Read More
Woodsmith Issue 192
December 2010

Tips & Techniques
…Ver Steeg, Peter J. Larson, David Kallemyn, Erich Lage Sled Stop A crosscut sled on the table saw makes accurate crosscuts a breeze. But one of the downsides is steering clear of the…my hands, but keeps the workpiece square to the fence, too. To make the jig, I cut a groove in the edge of a “carrier” board. Groove width matches thickness of …Read More
Woodsmith Issue 193
February 2011

Shop Notebook
…(page 14), I made a circlecutting jig for my band saw (see photo). The jig is just a 1⁄2" plywood base with…table saw. But the trick is to hold the box at a 45° angle while cutting the slots. To do this, I made a simple jig like the one shown at right. The jig… lower right drawing, the jig rides against the rip fence of your table saw. This way, you…Read More

Woodsmith Issue 194
April 2011

Tips & Techniques
…blades. I find it a difficult task to sharpen these tools with a standard honing jig. So I built the jig you see in NOTE: Fence and stop are made from (%/8"x 3!/2"- !/8" hardboard) …legs is an easy task if you have a compound miter saw. But it can be a hassle on a table saw to tilt the saw blade and angle the miter gauge correctly. Plus, drilling…Read More

Woodsmith Issue 195
June 2011

Shop Notebook
…Jig Cutting the short tapers on the legs of the folding table on page 24 is a simple job on the table saw. All you need is a jig to hold the leg at the proper angle. The jig… hardwood CLAMPING CAUL 2!/4 BASE x FENCE 6 NOTE: Wax jig to prevent glue from sticking 6 #8 x 2" …Read More
Woodsmith Issue 197
October 2011

Tips & Techniques
… Angle Miter Jig I needed to cut an acute angle (less than 45°) on the end of a workpiece. So I built the simple miter saw jig you see in the photo. This jig is flat and… it can also leave a residue on your workpiece. That’s why I use talcum powder on my table saw, jointer, and planer to keep the rust at bay. Just sprinkle the powder liberally on…Read More
Woodsmith Issue 197
October 2011

Shop Notebook
… flush with the bottom edge. This provides clearance for the router bit. To use the jig, start by laying out the ends and centerline of the two hollows on the …a. END VIEW 6!/2 &/8 !/2 !/2 #/4 Dado blade Stop block Mortise is formed by notches in miter joint the table saw. The trick is to cut a notch on the end of each mitered piece to …Read More

Woodsmith Issue 198
December 2011


Shop Notebook
…JIG. The glueup jig is easy to build. The base, clamp bars, and wedges you see in the drawing below can all be cut to size from plywood. (Use a band saw…glue from sticking to the base. USING THE JIG. To use the jig, set the frame parts in place, …both edges (detail ‘a’), I took the blank to the table saw. First, I made a 45° bevel cut along one side …Read More
Woodsmith Issue 203
October 2012

Tips & Techniques
… VIEW the top. Each end of the table has a threaded insert added that accepts a studded knob. You can cut the slot in the legs with a jig saw or router. Now miter the ends… back to size from MDF. Now cut rabbets and dadoes in the sides using the table saw equipped with a dado blade. There’s also a rabbet on the back edge of the top, bottom…Read More

Woodsmith Issue 207
June 2013

Shop Notebook
…these bevels on the table saw isn’t practical. So to handle this job, I put together the adjustable router jig shown in the photo above. The jig relies on a 11⁄2"long, …TABLE SAW. Now you’re ready to rip each blank into two molding strips at the table saw. After that, all that’s left is the rabbet, which is cut in two passes using a standard saw…Read More