
Showing 661 through 680 out of 1000 articles containing "table"

Bookends
…see Fig. 3. Then to dress it up a little, I used a •%>" Roman ogee bit on the router table to profile the edges, see Detail A. Finally, I glued and screwed the two pieces together. …. Then stops are used to control the width. I clamped plywood scraps to the router table so their edges were 4" from either side of the bit. Then, I routed the recess,…Read More
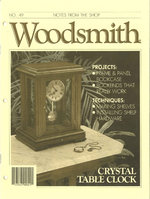
Woodsmith Issue 49
February 1987

Talking Shop
…" that will trim off a uniform 'An and leave a smooth siuface. To make the router table "jointer," glue a piece of plastic laminate (Formica) to the left (outfeed) side of… a problem with keeping the bottom edge straight. It's impossible to saw this profile on a table saw, difficult to straighten with a hand plane, and you get a ragged edge with a…Read More
Woodsmith Issue 49
February 1987

A Classic Bench
…and screw the pieces together. CUT THE DADOES. Next, add a long auxiliary fence to the table saw miter gauge and angle the gauge 4° clockwise. (This is a reading of 8(i° on some gauges…on the aprons. To cut the pins straight, start by mounting a combination blade on the table saw. Next, clamp a stop block to the rip fence to limit the length of cut…Read More
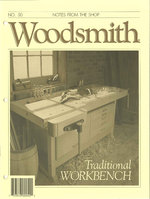
Woodsmith Issue 50
April 1987

Bench Base
… from the back edge. To position the base on the length of the table, line up the right arm 5%" from the end with the end vise, see Fig… bolts. MATERIALS LIST Overall Dimensions: 29Vi" d x 65V4" 1 x 34" h Working Surface: 18" d x 65 Vb" 1 A Table Top Slab (1) 1Vbx12'A-60 M Vise Spacer Block (1) lx3Vi-18 (Build up from seven …Read More
Woodsmith Issue 50
April 1987

Building the Slab
…clamps. Start by finding the flatest surface available to clamp on. This might be a large table, a flat section of floor in the shop, or a couple sawhorses, see Fig. 3. Now lay …to slot the two outside faces.) Shop Note: Don't cut the slots with a table saw or on a router table. A hand held router will follow any of the contours of the boards and…Read More
Woodsmith Issue 50
April 1987


Tips & Techniques
…small tlathead woodscrews. Clarence Goff Oregon City, Oregon SAW BLADE FILE DRAWER I built the table saw cabinet that was shown in Woodsmitk No. 47 but made a slight change in…store blades since the teeth from one blade might chip the teeth of another. TABLE SAW CABINET FROM WOODSMITH NO. 47 DRAWER WILL ACCOMMODATE 10" BLADES By making …Read More
Woodsmith Issue 50
April 1987


Band Saw Circle Jig
… the blocks tight against the inside (left) edge of the table. turnbuckles. To mount the jig to the table, drill two counterbored shank holes for carriage bolts, see Fig. …BOTTOM OF BASE TIGHT AGAINST LEFT EDGE OF TABLE FIRST, CLAMP JIG TO BAND SAW TABLE SO BACKBOARD IS TOUCHING RIGHT EDGE OF TABLE NOTE: BLOCK IS SLIGHTLY THINNER , THAN …Read More

Woodsmith Issue 51
June 1987

Bandsaw Basics
… The other half is developing a cutting technique. SLOWDOWN. If you feed wood too slowly through a table saw, the wood may burn. So there's a tendency to feed at a pretty good clip. … turning on the motor. READJUST the FENCE. Now draw a pencil line across the saw table along the bottom edge of the workpiece to mark the drift angle, see Fig. 2. …Read More
Woodsmith Issue 51
June 1987

Bandsaw Boxes
… that your band saw blade is exactly 90° to the table. I used a '/■/' blade for all the cuts on the boxes. … a nail in a circle jig that's attached to the band saw's table. {To build a band saw circle jig, see the plans on … Start by setting the rip fence (or a board clamped to the table as a fence) about [A," from the blade and trim a strip of …Read More
Woodsmith Issue 51
June 1987

Classic Roadster
…BLOCK The car is primarily a band saw project, but the preliminary cuts are made on a table saw for straight reference lines. BODY BLOCK. The first straight cuts are made to …in a single pass with a dado blade, see Fig. 3. windscreen slot. The last step on the table saw is cutting a kerf to the thickness of the windscreen (see Sources, page 24). …Read More
Woodsmith Issue 51
June 1987

Landscape Lid
… the design) on the top board. Next, cheek to be sure that the band saw table is exactly 90° to the blade. START AND STOP POINTS. When cutting out the design… upper edges of the band saw cuts with an '/*" round-over bit on the router table, see Pig. 5. FITTING THE VENEER To fill in the void left by the band saw…Read More
Woodsmith Issue 51
June 1987

Radial Saw Adjustments
…blade on a radial arm saw. There's no parallel reference (like the miter gauge slot on a table saw) to line the blade up with. bad advice. To compensate for the lack …head almost touches this tooth. When it's in place, clamp the plywood to the saw's table, see Fig. 2. LOCK CARRIAGE. For maximum stability when measuring from the edge of the FIGURE…Read More
Woodsmith Issue 51
June 1987

Tips & Techniques
…ROUTER FALLOUT Adjusting the height of my new Sears router on my Woodsmith router table used to be a problem. When I loosened the thumb screw on the router to …built a height adjuster to support and raise and lower the router. Since 1 built the router table with legs and storage cabinet underneath, I had a sturdy shelf about 3" below the bottom of…Read More
Woodsmith Issue 51
June 1987

Centerless Counterboring
… lens cap. To do this, clamp a baseboard to the drill press table, bore a Ve" hole %" deep and push the centering dowel into the hole, … X^ ^t PLACE DISK OVER '/," DOWEL 6 ^^^^-^ f POSITION CENTER V__DOWEL IN W HOLE — DO NOT MOVE DRILL PRESS TABLE Note: To prevent the jaws of the pliers from marling the end…Read More
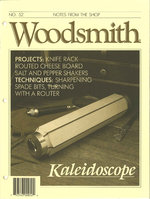
Woodsmith Issue 52
August 1987

Cheese Board
… making the fancy routed design in this cheese board. You can set up your router table with stop blocks and spacers (as we did for the trivets in Woodsmitk No. 41…. That's the approach I took this time. With a box jig you don't tie up your router table. And once you build the jig, it's easy to use in the future. Just pull…Read More
Woodsmith Issue 52
August 1987

Kaleidoscope
…. While this is a candidate for a lathe project, it's even easier to make on a router table — using a special turning jig. (See page 8 for more on how to make this jig.) …To do this, mount a '■'■/" core box bit in the router so it projects %" above the table surface. Then make progressively deeper passes until the shoulder at the base of the …Read More
Woodsmith Issue 52
August 1987

Knife Rack
… of plywood and a pivot nail, see Fig. 3. Then clamp the jig to the band saw table. (For plans on maldng an adjustable circle cutting jig, see Woodsmitlt No. 51). To cut… PIECE. Since the back (D) is only '%«" thick, the blade must be lowered to %" above the table before making any kerfs in it. The kerfs in the back (D) must align exactly with…Read More
