
Showing 701 through 720 out of 1000 articles containing "table"

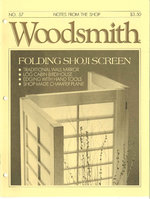
Folding Screen
…To hold the workpiece tight against the fence, I clamped a featherboard to the saw table. 1 Br 1 I ■ ^ WOODSMITH Then cut two grooves on the inside edge … back fences to the base. ATTACH MITER GAUGE. Next, set the table saw miter gauge to 90F and check that it's cutting perfectly…Read More
Woodsmith Issue 57
June 1988

Log Cabin Birdhouse
… edges on the router table, see Fig. 3. FIGURE i GABLE LOGS ® 6 PIECES w >'// >'■ 1 WALL LOGS ® 20 pieces '/." ■ t \ i '■," ■ …PIECES REQUIRED FOR SHINGLES / i / \ ROUTER TABLE FENCE DETAIL %" ROUNDOVER BIT / 1 \ i i ii i iMiim M \/ ^>- ^ .,_^.,—.-_*-!jl 1 Yl It-'-' ---'—- _ __—k—.—. …Read More
Woodsmith Issue 57
June 1988

Wall Mirror
… profiled molding strips (F, G). I made these moldings on the router table from a 2"-wide piece of '//-thick stock, see Step 1, Fig. 5. … '—7—?—y~ ROUGH BLANKS 20", 26" LONG ©© PIECES ■ *J NOTE: RESAW PIECES FROM 4/4 (>V,„") STOCK 2 ROUTER ^-*-TABLE-------^ FENCE ^=L, ROMAN TOGEE BIT SHOULDERS EQUAL WIDTH RIP W OFF…Read More
Woodsmith Issue 57
June 1988


Tips & Techniques
…ADJUSTMENT STOP BLOCK I make lap joints frequently and use a simple adjustable stop block for my table saw to accurately locate and cut the shoulders. The stop block lets me fine tune…hole when the punch is lowered. By moving the tin around on the drill press table and lowering the punch into the tin, he punches uniform holes. Dmiglas Stovall of …Read More
Woodsmith Issue 57
June 1988

Shop Notes
… help cut vibration for a smoother cut.) Since most router table fences have a bit opening, start by screwing an…" in one pass.) \ \ SCREW AUXILIARY FENCE X A TO ROUTER TABLE FENCE Yvfe-S^ 3"~^t--^J*^k V- X? m, NOTE: ~J ^n^V" FEED V^_ jjj\ -asss^**** ==i=s===^^N^^=i=: WORK FROM LEFT TO…Read More
Woodsmith Issue 57
June 1988

Cherry Dresser
…to a W' round-over bit raised Vu" above the table, see Step 2. After the pieces are routed, … ONE EDGE — MAKE SEVERAL PASSES ©> T W JL FIGURE 18 / ) / V / TABLE / /, SAW / // FENCE frWer^. r / i © \ MOLDING 1 / STRIP / l«v,'v RIP WASTE FROM STOCK …Read More
Woodsmith Issue 58
August 1988

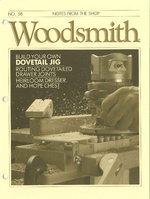
Dovetail Jig
… on each end. (The wings are used for clamping the jig down to a bench or table, see photo.) CUT TO width. Once the base is assembled, trim it down to a finished… accept the eye bolts. I did this by standing the piece up on end on the table saw and backing it with a 2x4 block, see Fig. 5. Cut a l%"-deep slot centered on each…Read More
Woodsmith Issue 58
August 1988


Hope Chest
… at both ends of the panels. ROUT DADO. Next, I used the router table to rout a '//-deep dado on the other face of each panel …Detail. To rout this dado, mount a %" straight bit in the router table and set the fence so the outside of the bit … dadoes on the end panels. I cut this on the router table, see Comer Detail in Fig. 3. Sneak up on the cut …Read More
Woodsmith Issue 58
August 1988

Cutting Round Corners
… way to make clean, smooth cuts at 90° is on a table saw or FIGURE 1 A WEAK CORNER A STRONGER CORNER radial arm saw, … angle off one end, see Step 1. Shop Note: When using the table saw, screw an auxiliary fence to the miter gauge. …WASTE OFF END 1 First, attach an auxiliary fence to the table saw miter gauge and clamp tlie blank to the fence…Read More
Woodsmith Issue 59
October 1988


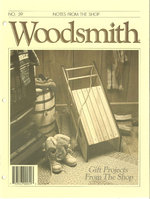
Kid's Sled
… The runnel's have strictly modern trimmings. We covered the edges with vinyl T-molding — the table edging that's commonly used on inexpensive plywood and particleboard furniture. This trim makes … fit the mortises in the runners, see Fig. 7. I cut these notches on the table saw using the miter gauge for support. Since the fence is used as a stop, …Read More
Woodsmith Issue 59
October 1988

Serving Tray
…and handles with a %" round-over bit mounted on the router table, see Fig. 10. Also round over the top inside edge …edges is awkward. I held the tray frame vertically on the router table and slid it in an arc into a %" round-over bit, see… it to width and length (on the marked lines) on a table saw to get a smooth cut. Then sand the corners round on …Read More
Woodsmith Issue 59
October 1988

Wall Clock
… groove location onto the corner block, see Fig. 3. Now, move the table saw rip fence so the saw blade lines up with the…. To do this, I used a pin-routing jig on the router table, see Fig. 7. (For more on the jig, see page 23.) … see Fig. 8. Now cut the face to width and length on a table saw. Then sand the comers round on a disc sander until they…Read More
Woodsmith Issue 59
October 1988

Shop Notes
… back of the clock frame, I mounted a W straight bit in the router table and raised it 1" above the table. Then adjust the pin (by moving the fence) so the bit takes a …But there's something else to consider here. Typically you push the workpiece across the router table from right to left. It's different with the pin router. Since the workpiece is …Read More
Woodsmith Issue 59
October 1988

Desk Frame
…the bottom edge for the key. I cut this groove on the router table using stops on the fence to limit the length of the groove, see Fig… Use the same set-up (with the stop blocks) on the router table to rout a W-deep groove, see Fig. 5. Then use a Vs" round-over bit…=7tj NOTE: DO NOT CHANGE ESS POSITION OF FENCE OR STOPS ON ROUTER TABLE…Read More
Woodsmith Issue 60
December 1988

Display Easel
…of the block, refer to Fig. 1. Then raise the bit until its height above the table equals the length of the tenon you want (%"), plus the thickness of the '/«" Masonite. …you don't have a drill press fence, clamp a straight piece of 2x4 on the drill press table, then mark an index line. Now drill the holes, W deep at each centerpoint aligning the…Read More
Woodsmith Issue 60
December 1988

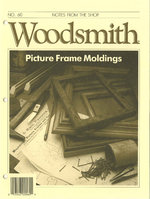
Frame Details
…square to make sure it's exactly 90° to the top of the table. CUTTING THE MITERS When the saw is set up, work can…here. The miters can be made with the miter gauge on a table saw or on a radial arm saw. Either way, you can have problems…miter jig, see page 18. FIRST CUT. If you're using the table saw jig, the first cut is made by holding the …Read More
Woodsmith Issue 60
December 1988

Miter Jig
… %" cabinet grade plywood, 20" x 24". The jig is guided on the table saw with a guide runner. To mount this runner, cut a dado about … easy to see and position in the slot on the table saw. trim edge. Now the right edge of the base …MITER JIG The same problems exist on a radial arm saw as on a table saw. You have to cut 45° miters, and like pieces…Read More