
Showing 821 through 840 out of 1000 articles containing "table"

Matched Moldings
…CAP s^-— i i : i.j-i^J ,- "^ '- r DIVIDER—' ^- STILE INSIDI DO va \ STILE RIP FENCE 1 \ 1 i 1 t ROUTER TABLE FENCE INSIDE FACE UP o> 1 ROUND-OVER BIT 2 Next,… side. 3 Mount 'A" round-over bit in router table, and adjust height to leave Vs" shoulder. Then …Read More
Woodsmith Issue 78
December 1991

Tips & Techniques
… But two readers wrote in with neat teehniquesfor cutting quick, accurate notches using the table saw and the radial ami saw. Tom Kolar of Lafayette, California suggested cutting … by hand either. In- NOTE: CUT NOTCHES WITH BEVELED EDGES DOWN ON SAW TABLE BRACE RAIL AGAINST MITER | GAUGE FENCE DADO BLADE stead, he built a simple jig …Read More
Woodsmith Issue 78
December 1991


Desk Clock
… To do this, lower the blade below the surface of the table. Then set the rip fence Vie" from the outside edge of the saw blade. Now turn on the table saw and slowly raise the saw blade to 5/8", see Fig. 2. With the top face of the workpiece down on the table, make one pass on the outside edge of each blank …Read More

Woodsmith Issue 79
February 1992

In/Out Box
… thickness, refer to Fig. 6a. To do this, I made a positioning "comer" on the drill press table with a fence and a stop block, refer to Fig. 6. To position the comer, use a spacer the… jig yet. To complete the two tenons, I cut the shoulders usingthe miter gauge on the table saw, see Fig. 16. First, raise the blade just below the face of the tenon…Read More
Woodsmith Issue 79
February 1992

Pedestal Desk
… to the backs, see Fig. 3b. To cut the rabbets, I used a dado blade on the table saw. (Note: To avoid chipout, I first cut the shoulders with a crosscut blade.) Start by cuttingthe…the bottom side of the handles, 1 used a VS" core box bit mounted in the router table. Then, taper the front corners of each handle, and glue the handles onto the panels…Read More
Woodsmith Issue 79
February 1992

Shoulder Planes
…Obviously, I needed to do a little trimming, but how? There was no going back to the table saw because the cabinet was already assembled. And setting up a router to do the… with the shoulder plane. CLEANING UP DADOES AND GROOVES. Cutting dadoes and grooves on a table saw can result in a rough bottom. Sometimes this doesn't matter. But when the end …Read More
Woodsmith Issue 79
February 1992

Shop Notes
…the routing operations safer, I built a jig to hold the blank while routing on the router table, see drawing at right. This also helps to produce pulls that are identical in … It should fit snugly between the side cleats. Clamp a pair of stops to the router table an equal distance from, the center of the bit. This distance determines the travel …Read More
Woodsmith Issue 79
February 1992

High Back Bench
… Here it's easier to cut the V-grooves after gluing up each panel. 1 did this on a table saw with the blade tilted to 45°. wood. I used W-thick No. 2 Ponderosa pine for …in the backside, I routed the edges of each slat with a chamfering bit on the router table, see Fig. 2a. (Don't chamfer the ends.) BOTTOM AND CENTER CLEATS. The bottom and center…Read More

Woodsmith Issue 80
April 1992

Tips & Techniques
…. To produce the beveled angles on such a small strip, I made a simple jig for the router table. To build the jig, take a squared up 2x4 and rip a V2"-thick strip off one… a test piece in the enclosed groove, see Fig. 1. Now clamp the jig on the router table so the bottom corner of the test piece just touches the bit. Next, make a test…Read More
Woodsmith Issue 80
April 1992

Shop Notes
…straight edge. (The sabre saw probably left some splinters.) So run each panel through the table saw with the straighlest sabre-sawn edge against the rip fence, making a straight cut…the bottom side of the panels where it won't be visible after assembly. SECOND TABLE SAW CUT PRODUCES ONE SQUARE CORNER DEALING WITH WOOD MOVEMENT ■ If you build the…Read More
Woodsmith Issue 80
April 1992

Talking Shop
… Talking Shop 115 VOLTS OR 230 VOLTS? ■ The owner's manual that came with my 10" table saw explains how to modify the motor so it can run off either 115 volts… to clean rusty tools and quiet squeaky hinges. And some even protect their cast iron table tops with it. But I personally avoid exposing the bare wood or finishes in my projects…Read More
Woodsmith Issue 80
April 1992

Stationery Box
… Vfe" chamfer on the top outside edge of the frame pieces using the router table, see Fig. 3. Finally, miter the frame pieces to finished length, see Fig. 1. BASE SIDES … '^SECOND: ^^ CUT OFF WASTE ALONG LINE /^ S^Vs plywood when setting up die router table. Sneak up on the depth until the tongue just fits the groove, see …Read More

Woodsmith Issue 81
June 1992

Entertainment Center
…storage A zero-clearance insert prevents the narrow edge of a ivorlcpiece from tipping into the table saw opening. A push stick keeps your hand away from the spinning blade. doors… So first I remove the bearing, then run the workpiece along an auxiliary router table fence — it acts just like a bearing. install THE GLASS. Before installing the …Read More
Woodsmith Issue 81
June 1992

Tips & Techniques
…No. 81 RAISED PANEL JIG ■ 1 like to make raised panels on the router table rather than on the table saw. To do this, I use a shop-built panel-raising jig and a straight router…braces. To make raised panels, align the jig over a straight bit mounted in the router table, see Fig. 2a. Now, hold the workpiece firmly against the fence and down on …Read More
Woodsmith Issue 81
June 1992

Shop Notes
…OF SHELF 16 Woodsmith No. 81 JIG FOR MORTISING MITERS ■ Normally, setting up a router table for cutting a spline mortise is a straightforward process, 'file depth of the mortise is … thickness of the jig's base when setting the depth.) Next, adjust the router table fence so the mortise is centered on the thickness of the workpiece. Shop Tip…Read More
Woodsmith Issue 81
June 1992

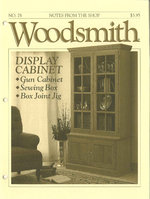
Drafting Cabinet
…thick shelf lip (D) on the front edge of the shelf, see Fig. 1, ROUTER TABLE FENCE ROUND OVER BOTH SIDES WITH SAME SET-UP 24 Woodsmith No.… PIVOT BLOCK r 45' BEVEL 3/8"-DIA. HOIE (SEE DETAIL a.) a. CROSS ) \ SECTION \p TABLE Va" The second step is to position the door inside the …Read More
Woodsmith Issue 82
August 1992

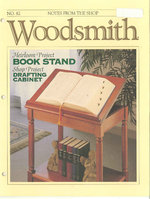
Book Stand
… between, see Fig. 3. To cutoutthe mortises, first clamp afence to your drill press table and adjust it so the width ofthe blank will be centered under the… adjusted, see Fig. 22. Note: The stand also makes an attractive flat top table, see photo on page 32. 19 45'BEVEL PROP K3|-^ *+\ i_ NOTE: "», 1 "--1VS"…Read More
Woodsmith Issue 82
August 1992

Square Leg Design
…see Fig. 1. First, I cut the taper using a tapering jig on the table saw. Set the jig to begin the taper at the… To create the look of a foot on each leg, I used the table saw again to cut a V-groove 2" from thebottom end, see Fig. … edges with a V4'1 round-over bit mounted in the router table, see Fig. 3. Once the legs are rounded, the corners of …Read More
Woodsmith Issue 82
August 1992

Shop Notes
…swing the table from under the chuck and place the jig on the table. Now adjust the table so …the jig. 2 rjj T^T" . \ ADJUST TABLE - V BIT ALIGNS VFPTir any IN POCKET 3 rz CLAMP JIG ^^\ t° table / TABLE IS / SWUNG S ^ CLEAR OF -~-^=| CHUCK e \j ^*N N^---------CLAMP\ fTs.…Read More