
Showing 981 through 1000 out of 1000 articles containing "table"

Accessory Box
…be cut. I routed all the joints on the router table. When working with small pieces, I like using the router table instead of the table saw. The router makes nice, clean cuts that …dadoes for the front and back of the box, I used a 1/ " 8 straight bit in the router table and the same scrap push block I had made earlier, see Fig. 8. The only odd …Read More
Woodsmith Issue 107
October 1996

Tips & Techniques
…gets too chewed up, I just flip it over. Lee Tjelmeland Vinton, Iowa Angled Holes The table on my drill press doesn’t have a gauge for drilling angled holes. So instead, I use the…up the miter gauge bar with the column of the drill press, I can set the table top to the correct angle. Bud Pierce El Cajon, California Keyhole Slot Hanger Keyhole slot…Read More
Woodsmith Issue 107
October 1996

Shop Notes
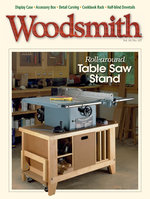
… Fig 1. I started by setting the height of my router bit. Then I adjusted the router table fence so it was the proper distance away from the bit (3/ "). 8 STOP BLOCKS. …other side of the box. 1 a. 2 a. 3 a. 18 Woodsmith No. 107 SAW STAND ACCESSORY HANGERS The table saw stand on page 20 includes a couple of pegboard sliding racks to hang saw…Read More
Woodsmith Issue 107
October 1996

Mantel Clock
…they’re so small, they can get hung up in the insert plate on the table saw, and there’s potential for kickback. So I started with oversize blanks and used a zero clearance insert in the table saw, see box below. With the stops routed, they can be mitered to fit the…Read More
Woodsmith Issue 108
December 1996

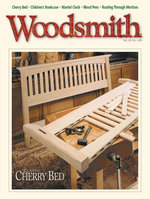
Classic Cherry Bed
…the inside and bottom edges of the tapered section won’t sit flat on the router table, I didn’t round over these edges either. Instead, lightly sand them just enough to break the…a drum sander that’s at least 21/2" tall. FENCE. Just clamp a fence to your drill press table near the drum sander. Then feed the slats through the sander one at a time, …Read More
Woodsmith Issue 108
December 1996


Talking Shop
…when it comes to jigs. So when I saw this one for making pens on a router table, I just had to try it. The Tompkins Turner is a turning mandrel on wheels, see …do when turning them. But the are a couple stop blocks that are attached to the table. . Note: The instructions recommend using a 1/ " straight 2 bit with a cutter across the end. (I used an …Read More
Woodsmith Issue 108
December 1996

Knife Rack
… a. 30 Woodsmith No. 109 To taper the dividers, I used the table saw and a shop-made jig, see the drawing on page 30 …a 2"-wide knife, so when setting the rip fence on the table saw, I made sure the dividers tapered to 21/8" at the top,…later. To cut the rabbets, I used a dado blade on the table saw with an auxiliary fence to back up the cut. (…Read More
Woodsmith Issue 109
February 1997

Corner Computer Desk
… two corners. But instead of cutting the piece out on a table saw, I used a handheld sabre saw, staying on the waste … cut, I cut 1/ " x 1/ " tongues on all four edges 4 4 using a router in router table, see Figs. 11 and 11a. The tongues will be …the grooves and stub tenons can be cut on a router table or table saw, see Figs. 11 and 11a. Once the…Read More
Woodsmith Issue 109
February 1997

Reader's Jig
…JIG F eatherboards are great for holding stock against the fence of a saw, jointer, or router table to prevent kickback. And a jig sent in by James Clark of Dayton, Ohio allows … featherboards quickly and easily. The jig rides in the miter gauge slot of your table saw, holding the featherboard blank at an angle. This allows you to cut a series …Read More
Woodsmith Issue 109
February 1997


Shop Notes
… a taper. But for the legs on the end table, we decided to use a table saw and a shop-made jig. The jig is nothing more… even pressure when gluing up the sides of the end table on page 20. So instead, I used band clamps, see drawing. The… to ripping the bevels on the legs of the end table featured in this issue, there are a few pointers that make the…Read More
Woodsmith Issue 110
April 1997

Talking Shop
… until the knives are positioned properly. Next, check the level of your outfeed table in relation to the height of the knives. In order for a jointer to… without touching it, the table is positioned too high. Use the table adjusting mechanism to lower the table accordingly. Note: Not all jointers have adjustable outfeed tables. If yours doesn’t,…Read More
Woodsmith Issue 110
April 1997


Garden Arbor
… For instance, cutting a tenon is usually a simple matter on the table saw. Unless the piece happens to be an 8foot-long …(863/4"), see drawing. My first instinct was to use the table saw. But then I realized that these pieces were too long. So…too long to be able to cut their tenons on the table saw. So again, I used a hand saw. For more on cutting …Read More

Woodsmith Issue 111
June 1997

Tips & Techniques
… on my miter gauge, or I clamp a block of wood to the rip fence of my table saw to use as a stop. But recently I was making a project that called for several shor… the block, except that it’s sized to fit in the miter gauge slot of your table saw. And the spacers are only 1/8" thick. Then a 5/16"-dia. countersunk hole is drilled in…Read More
Woodsmith Issue 111
June 1997

Shop Notes
… to make sure all the holes line up evenly, I attach a fence to my drill press table. Once the bulk of the waste has been removed, the sides of the mortise can… Fig. 3. 1 2 3 Tenons on Posts When it comes to making tenons, I typically cut them on the table saw. But because the posts of the garden arbor are so long (nearly 8 feet), I decided…Read More
Woodsmith Issue 111
June 1997

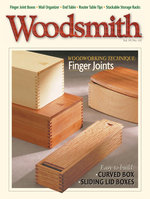
Jewelry Box
… RABBETING THE EDGES. The 1/4" x 1/4" rabbets takes some extra care, see Fig. 4. I used the router table with a 1/ "-dia. straight bit and a fence. What 2 you want to avoid is chipout (…on, I sanded it flush by placing strips of adhesive-backed sandpaper down on my table saw and moving the box back and forth over the sandpaper. Next, rout a 3/16…Read More
Woodsmith Issue 112
August 1997

Shop Notes
…into the spline joint. After laying out the mortise, I adjusted the fence on my router table so the router bit was centered on the thickness of my test piece, see …Strips Instead of making individual mortises one at a time for the spindles in the coffee table (see page 6), I used a different approach. First I cut a groove on one edge of each end …Read More